 In one weekend this tired-looking bedroom, which was filled with junk shop furniture, was re-styled with with a can of paint, swatches of wallpapers and pretty vintage accessories.
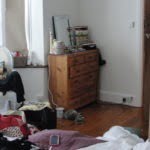
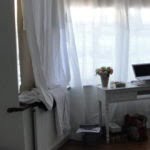
Before// My bedroom was shameful! With white-washed walls, shabby net curtains, stained blinds and a mish-mash of pine furniture, it needed some serious vamping-up to make it into a bedroom I would be proud of.
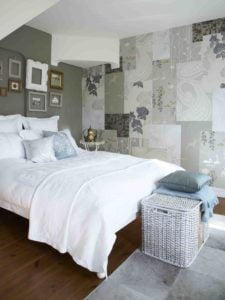
After// If I say so myself, my room is now a chic retreat in soft grey tones and a pretty feature wall, and – the best bit – it only took my dad and me a weekend to complete.
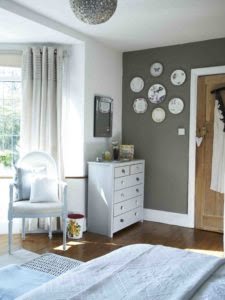
1/ Go for several feature walls. Rather than paint every wall in this large room, which would be time-consuming and expensive, I painted two of the walls in a dark grey paint, ‘Granite’ from Fired Earth.
= cost £35/litre matt emulsion
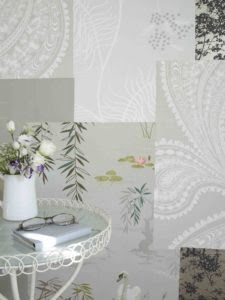
2/ Make a statement with wallpaper. This was so easy but looked so expensive. I got lots of half-used rolls of wallpapers from the discount bin from my local DIY store, then cut them into one-metre lengths and pasted them on top of each other, using a level to make sure they were straight to create a patchwork effect. I chose a Nina Campbell and a Sanderson one, as well as own-brand ones from Homebase. While my dad was busy painting the walls and the furniture, this is what I spent most of my time doing.
= cost £40
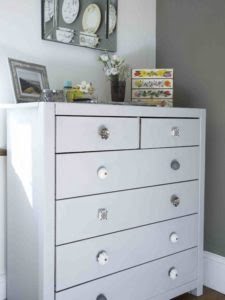
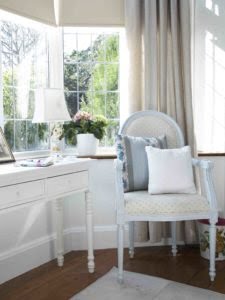
3/ Paint pine furniture. I went crazy with paint in this room, painting all the pine furniture in shades of off-white and grey so they would sit well together. I used matt emulsion as I prefer the finish, plus it dries quicker and it’s cheaper, before giving it a vintage vibe with pretty handles picked up from Zara Home. I also found this old Louis IV-style chair in the garage at my Mum’s. Dad gave it a quick coat of paint to help it blend into the room. Now it make a great feature in my window place.
= cost £14.99
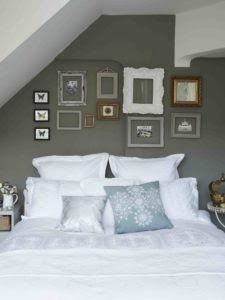
4/ Add personality to walls. So this room is all about the large walls – and filling them. I hunted around charity shops to find vintage frames for behind the bed. I’ve filled them with little postcards, photobooth snaps, items from my travels… I love the way they look. And then by the door, I hung up a collection of plates – even one of the Mona Lisa – in a circle pattern to match. It was helpful to have two people involved at this stage, otherwise I would have been there all night just trying pick out a design!
= cost £25
5/ Add end-of-bed storage. Considering how large this room is, it really lacked decent storage for all my stuff! I got this wicker storage basket from an antiques market in Brighton for £5. It was a yellowy wicker, so I gave it a dash of paint, and now it (almost) houses all my handbags. The pretty console table that sits in the bay window was from my old house, and again it was revived with a lick of paint. It now works as a dressing table/desk.
= cost £5
6/ Finishing touches. Covering up the wooden flooring with a large hide rug instantly made this bedroom more inviting. I’m drawn to white bed linen. Very impractical, but it always looks so smart and boutique hotel-like when on the bed. I love fresh flowers, so I treated my room (and me) to a little bunch. And then I finished off the room with a new cushion from Laura Ashley and a cosy throw (from Primark). The curtains were eyelet ones from Dunelm Mill and I picked them up in the sale for £20 – they are a bit short for the windows as my dad pointed out, but you really can’t tell in the room. And anyway, at least this way they don’t drag along the floor. I gave the blinds a wash with some sugar soap so they looked as good as new.
= cost £45
So that is how you revamp a bedroom in two days on a tiny budget of £164.99 (plus tiny a bit extra for wallpaper paste, brushes etc).
Styling: Maxine Brady
**This feature first appeared in Real Homes Magazine**
With thanks to:
Bridget Peirson: www.bridgetpeirson.com
Real Homes magazine: www.realhomesmagazine.co.uk


Love this- and the selection of wallpapers used! The colour palette is so inviting. Just divine.