
I bumped into the lovely Kate Smith (who runs The Makery sewing school in Bath) in the summer. Her new book, Makery Sewing – is jam-packed with wonderful little projects. She kindly allowed me to share a few of her beautiful sewing ideas on WeLoveHome. At this is the first one – and here is one of her cutest designs (I think) – a sweetie tin shaped footstool. Grab your needle and thread.
This little 50p shaped footstool was inspired by Kate’s Grannie who had lots of these in her house, all in a row. ‘She had made them specially, from brown-gold velvet, and I always thought she had used sweet tins for the base,’ says Kate. ‘But my mum told me recently that in fact it was golden syrup tins, taped together.’ Set aside a weekend to try out Kate’s instructions below.
MATERIALS:
LARGE SWEET (OR BISCUIT) TIN. HEAVYWEIGHT COTTON FABRIC: 50CM X 110CM (20IN X 44IN) PIPING CORD: 100CM (40IN) WADDING: 50CM X 110CM (20IN X 44IN). BIAS BINDING: 2.5CM (1IN) WIDTH X 100CM (40IN) LENGTH. POLYESTER STUFFING: APPROXIMATELY 50G (2OZ). CO-ORDINATING POLYESTER THREAD
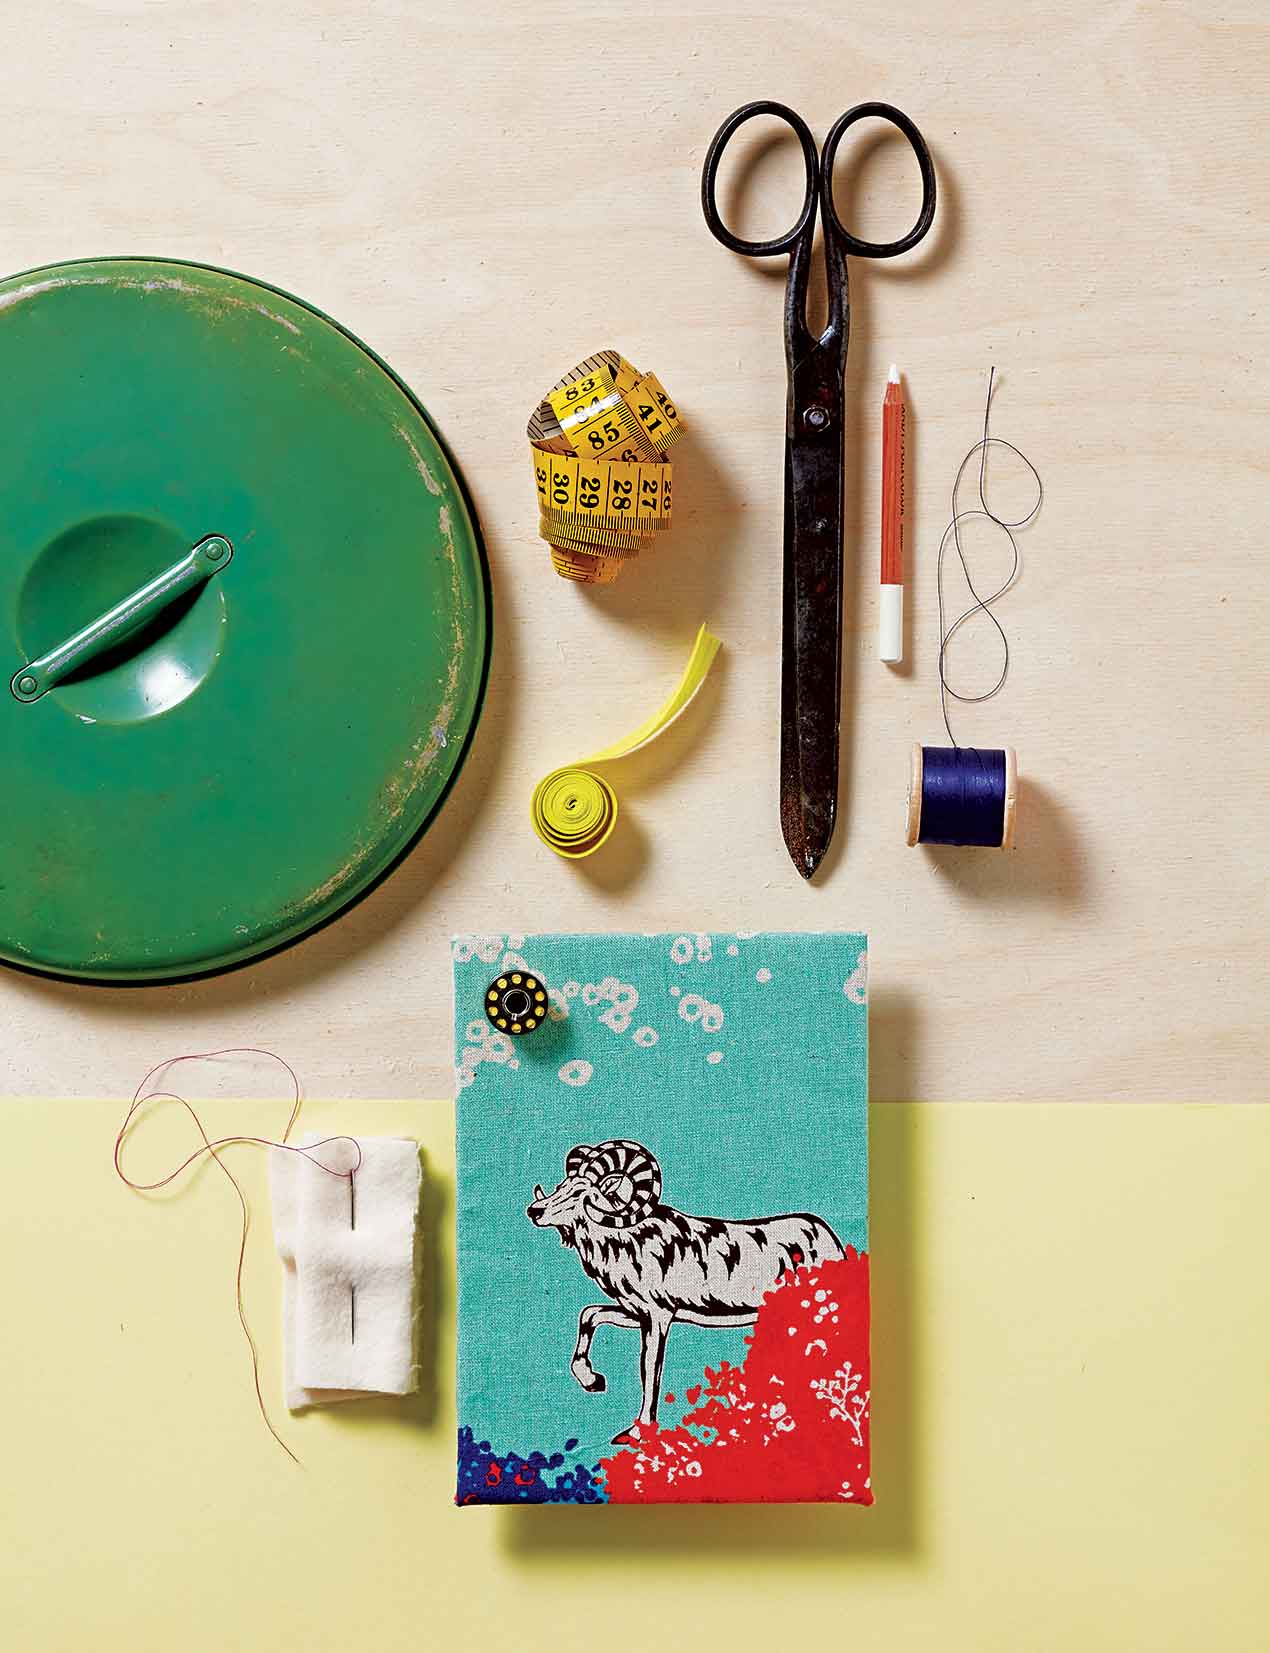 TOOLS: LARGE SHEET OF PAPER, PENCI, RULER, PAPER SCISSORS, TAPE MEASURE, TAILOR’S CHALK OR ERASABLE FABRIC PEN, FABRIC SCISSORS, IRON, PINS, SEWING MACHINE (WITH ZIPPER FOOT), NEEDLE
To Start… CUT EVERYTHING OUT
- First make the bottom pattern piece. Lay a large sheet of paper (a sheet of newspaper would do) out flat and place your sweet tin on top. Draw accurately around the tin and cut out. This is the bottom pattern piece.
- Place this pattern piece on the remaining paper and draw around it, this time leaving a 1cm (¼in) margin all round, making the top pattern piece 1cm ( ¼ in) bigger than the bottom piece. Cut out the top pattern piece.
- Measure around the side of the tin to find its circumference. Note the measurement. Measure the height of the tin and note that down, too.
- Using a ruler and tailor’s chalk or a fabric pen, mark a rectangle along one edge of your fabric that is the circumference measurement plus 5cm (2in) by the height plus 5cm (2in). Cut out this side strip.
- Now lay the bottom pattern piece and top pattern piece on the remaining fabric. If you have an interesting print (as on my version), position the top pattern piece carefully to frame a nice image. Pin in place and cut out both pieces.
- Using tailor’s chalk or the fabric pen, mark a rectangle on your wadding that measures the exact height by the exact circumference of the tin. Cut out the wadding side strip. Fold the remaining wadding in half and pin the bottom pattern piece onto it. Cut out around the pattern to give two wadding pieces.
MAKE AND FIX THE COVERED PIPING
- Cut a piece of piping cord to the length of the circumference of the tin plus 6cm (2⅓in). Cut a piece of bias binding to the same length.
- Open the bias binding out flat. Place the piping cord in the centre on the wrong side, and fold the bias binding in half over it. Pin together to hold the cord firmly in between, down the full length of the cord and bias binding.
- Attach the zipper foot to your sewing machine. Straight stitch down the length of the bias tape, close to the piping cord.
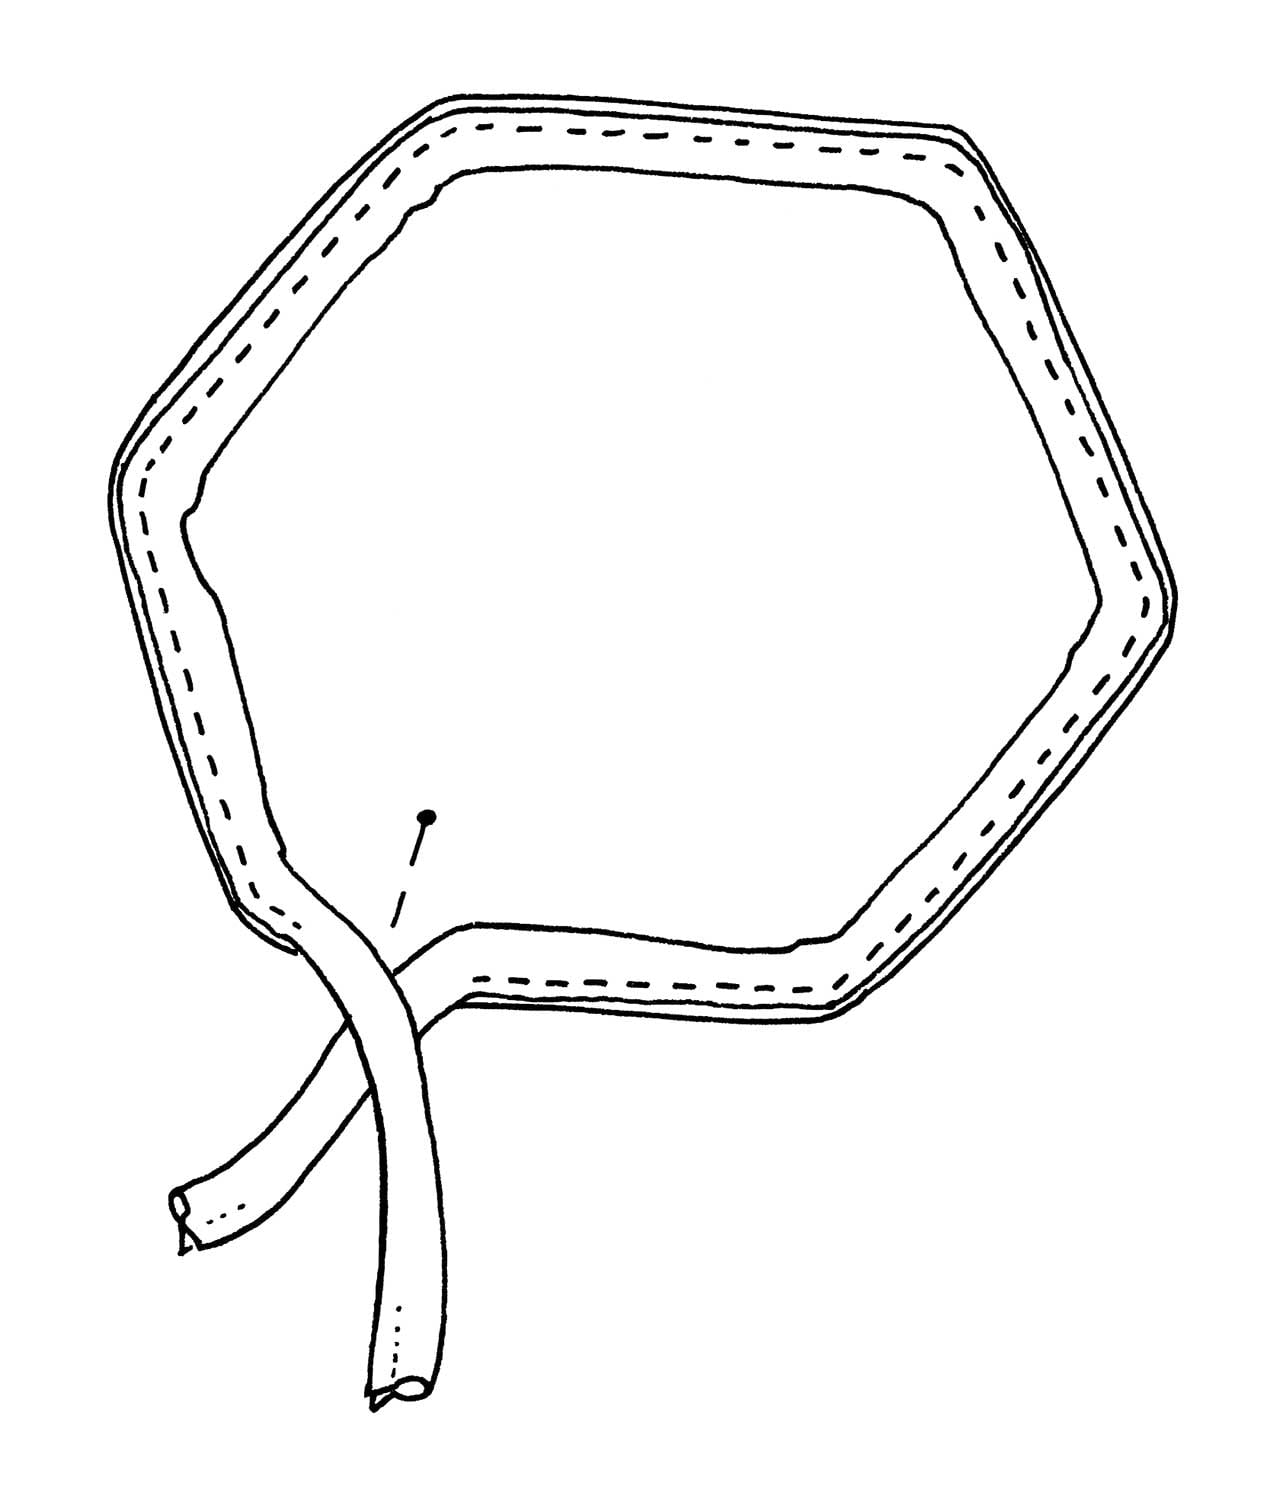
- Lay the top fabric piece right side up and pin the bias-covered piping all around it, matching all the raw edges together. Leave a trailing end of piping (of equal length) at the start and finish. Mark the point where the two parts of the bias covered piping meet with a pin (see Figure 1).
- With the zipper foot still attached, sew all the way around the edge on the flat bias binding, close to the piping cord, to attach the piping to the top fabric. Begin sewing 3cm (1⅛in) in from the marker pin. Continue all the way around, keeping close to the piping, and finish 3cm (1⅛in) before you get back to the pin. (See Figure 1.)
- Trim the ends of the piping cord so that they meet and butt up against each other at the marker pin. Trim the bias binding to leave an extra 1cm ( ¼ in) beyond the piping at each end.
- Open out the ends of bias binding and overlay them under the piping. Turn theouter piece of bias binding in by 0.5cm (⅛in), to neaten the edge.
- Stitch the gap closed, overlapping with the existing stitching and reversing at the beginning and end to secure.
COVER YOUR FOOT STOOL
- Lay the piped foot-stool top right side up. Take the long side strip of fabric and, with right sides together, pin it around the edge of the top, matching up the raw edges. The bias-covered piping will be sandwiched in between.
- Using the zipper foot, stitch all the layers together, close to the piping. Leave the first 2cm ( ¾ in) of the side strip free, and stop stitching when you reach the point where you began. Reverse at the beginning and end of the seam to secure. Trim the strip of fabric to leave 2cm ( ¾ in) at both ends.
 This is your fabric cover.
- Stretch the long piece of side wadding around the side edge of the tin. It should be taut (trim it if it’s gaping at all). Hand-sew together the two ends of the side wadding. Place one wadding piece on the top of the tin and sew the side piece to the top all the way round the edge. Turn the tin over, place the other wadding piece on the base of the tin and sew thistightly in place, too, stretching it taut as you go. (See Figure 2.)
- Put the stuffing on to the wadding top, spreading it out roughly – don’t worry if it looks like a lot, as it will be compacted.
- Take the fabric cover, turn it right side out and pull it down over your padded tin, catching the stuffing inside. Use ladder stitch to hand-sew the two side edges together, pulling tight (it’s really important you get a tight fit).
CREATE A PROFESSIONAL FINISH
- Turn the tin upside down. Working your way around the tin, pull the raw edges of the outer fabric up over the bottom and pin in place on the wadding base. Go round several times, pulling and re-pinning more fabric each time,until you have stretched the fabric as taut as it will go. (Just think how much use this footstool will get – you don’t want the fabric to go baggy.) When you’re happy with the stretch, hand-sew the fabric to the wadding base with a few large stitches, just to last you until the next step. (See Figure 3.)
- Take the bottom fabric piece, turn over a 1cm (.in) hem to the wrong side of the fabric all the way around and iron in place. Place the bottom fabric piece on the base of the tin to hide all the raw edges. This will leave a 1cm ( ¼ in) gap all the way around the edge. Hand-sew to the stretched sides of fabric using ladder stitch.
Katie’s top tip: Instead of plain bias binding, you could make your own from the same or a contrasting fabric (see pages 150–51).
Kate Smith runs The Makery in bath which offers workshops, classes, courses as well parties from her studio in Bath. She has also written two books (by Octopus Publishing) full of simple craft projects for you and your home. If you are interested in more, visit her website or her facebook page for more ideas and inspiration.
Keep popping back here to discover more of her easy sew ideas. We’ll she showing more of them over the next few months.
Very complicated! just scrolling through the diagrams & all the writing was enough to put me off! what a complete faff! & what happens when you have no sewing machine?, not everyone has one! or can afford one! or even know how to use one!
It’s a shame you feel like that – but these projects are not for everyone! Yes, the instructions are long but better when sewing to put more detail than less, hey. I’m a dedicated hand sewer as I prefer the finish. There are some far more simpler ones coming up. You could alway check out my 10 ten paint colours post – even a novice can handle a paint brush! Keep your eyes pealed for more simpler ideas Sharron.