
OMG! Never – I repeat – Never start an epic DIY job with a cracking hangover. A few months ago I decided to renovate a staircase which involved ripping up the carpet and sanding the wooden steps. This is all part of my grand plan to inject personality into my tiny hallway area. I didn’t anticipate the impact a bottle of red the night before would have on this overall experience – Urgh!
One day, my dream is to have floating staircases by First Step Designs in my home but for now, I needed to do a quick DIY renovation job on my old Victorian staircase. Follow my step by step guide!
Discover how to renovate a staircase in one day! Here’s a step by step guide and all the tools you need too.
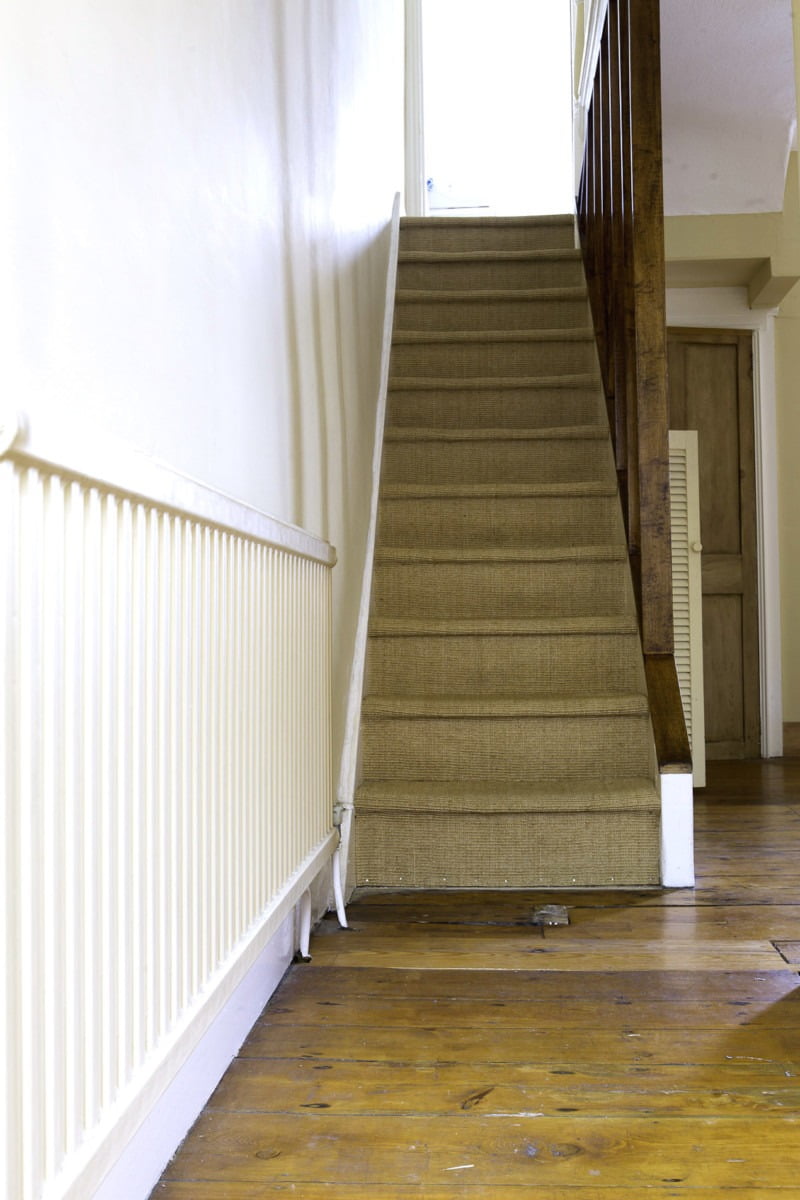
Before: When I moved in
Above is a photo of my staircase the week I moved into my Brighton home. Since March last year, this area of my home has had a hell of a lot of love pumped into it. I put in new radiators from Vouge which were installed with my new central heating. Then I put down engineered oak wooden flooring through out the ground floor. Then finally, I replaced the ugly 1980s death-trap banisters with sexy new banisters and spindles from Richard Burbridge. That was all Stage One of my hallway makeover – I still have Stage Two, Three and Four to go. I’m in it for the long haul
Before: My Carpeted Staircase
Above is where we are at one Saturday morning in December. Nice radiators, hey? And my flooring is pretty stunning too. The biggest let down? The stair carpet. Awful – Awful – Awful. It’s taken a serious beating over the past year-and-half. It got pretty trashed when I had the bathroom renovated as builder’s dust was ingrained in the treads. Then my flat mate spilt a glass of Port on it. The ‘carpet’ is in fact sisal flooring which was so slippy for these narrow stairs.
Dangerous and Dreadful

The carpet was coming away in places. I pealed away a bit to have a look at the bottom step, and I could see that I still have the original Victorian wooden stairs under that dreadful carpet. Lots of potential then.
Each step has a lip to it which was being covered up by the carpet. I know this is only a tiny thing but in a house with so little period features, these little lip could make an big impression in this small space.
My plan is to reveal the wooden stairs under that sisal and give them a modern makeover Maxine-styleeee. I’ve got an idea of what I want to do which I’m going to slowly reveal over the next couple of months. Here’s a taste of what I’m thinking for my stairs on my Hallway Pinterest board. Can you guess what I fancy doing??
Taking off the carpet
Ha! Easier said than done. Each step had about 20 staples in it. Then the carpet had been glued to the underlay and this had been glued to the wooden stairs. On top of that I had original Victorian nails sticking out everywhere. Imagine that, on top of a hangover. Flipping heck, after just one step I was cursing the person who laid this stair carpet. Grrrrr.
I tackled each step slowly. What I thought would be an simple job took me about 4 hours in total. Every single staple had to be removed by hand and every nail hammered down flat. Anything that sticks out will catch on the sander ripping the sand paper.
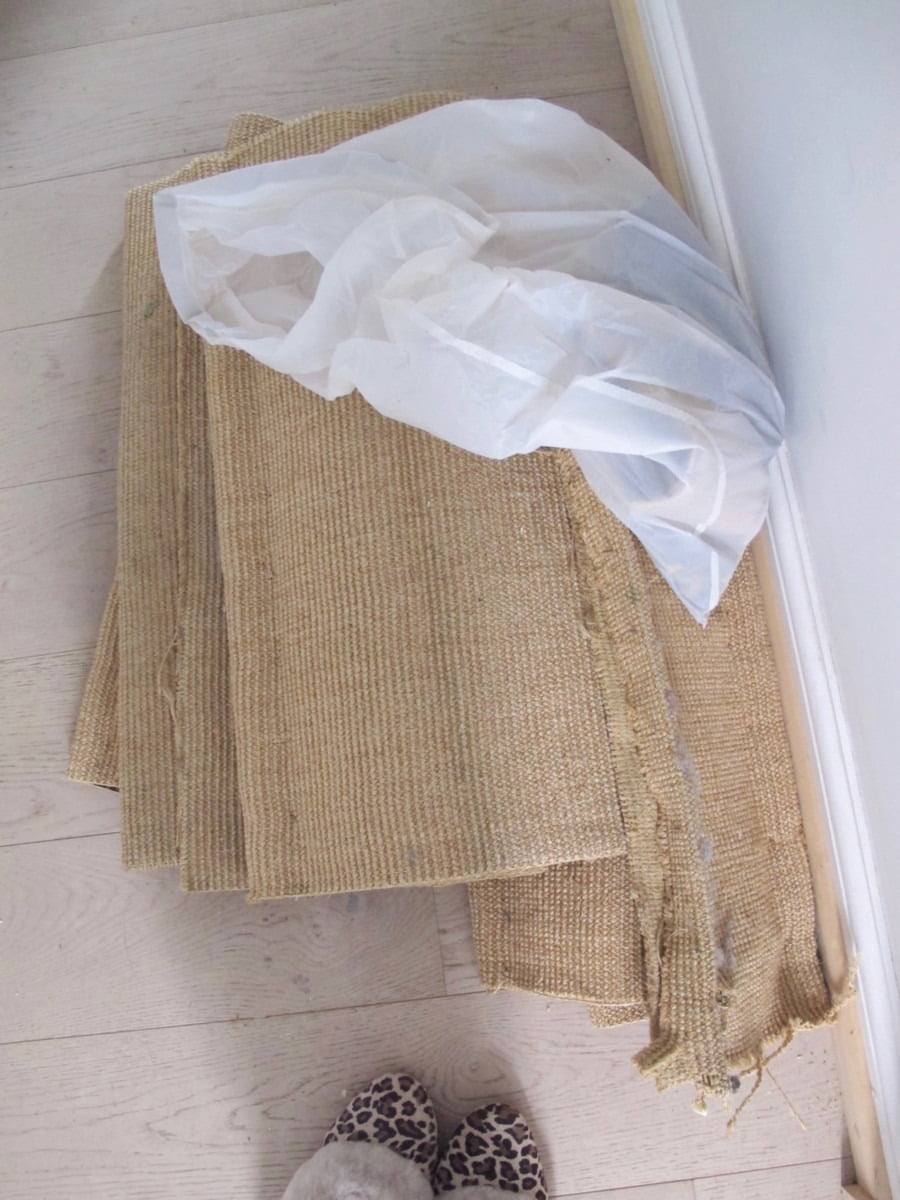
I filled a bag with staples (about 220 in total maybe more) and nails. Luckily, I have learned a lesson over the past year of doing DIY and that is to make sure you have the right tools. In this case I’d treated my home to a decent hammer, screw driver set and plyers. I had a set from the £1 shop before which were useless. I doubt without these tools I would have been able to get the carpet off. Oh and wear a decent pair of leather gloves to save your hands from splinters and blisters.
Like my new slippers in leopard print BTW? That how we roll over here.
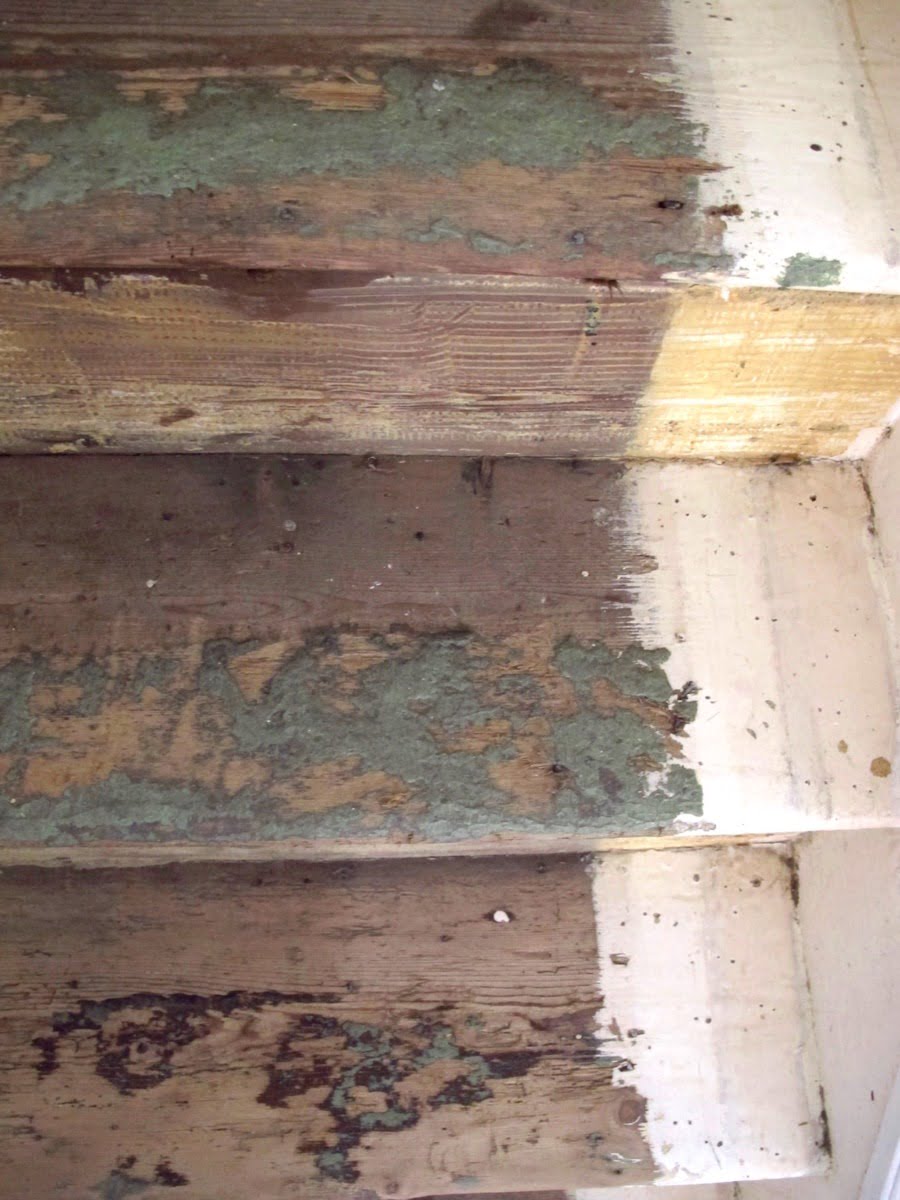
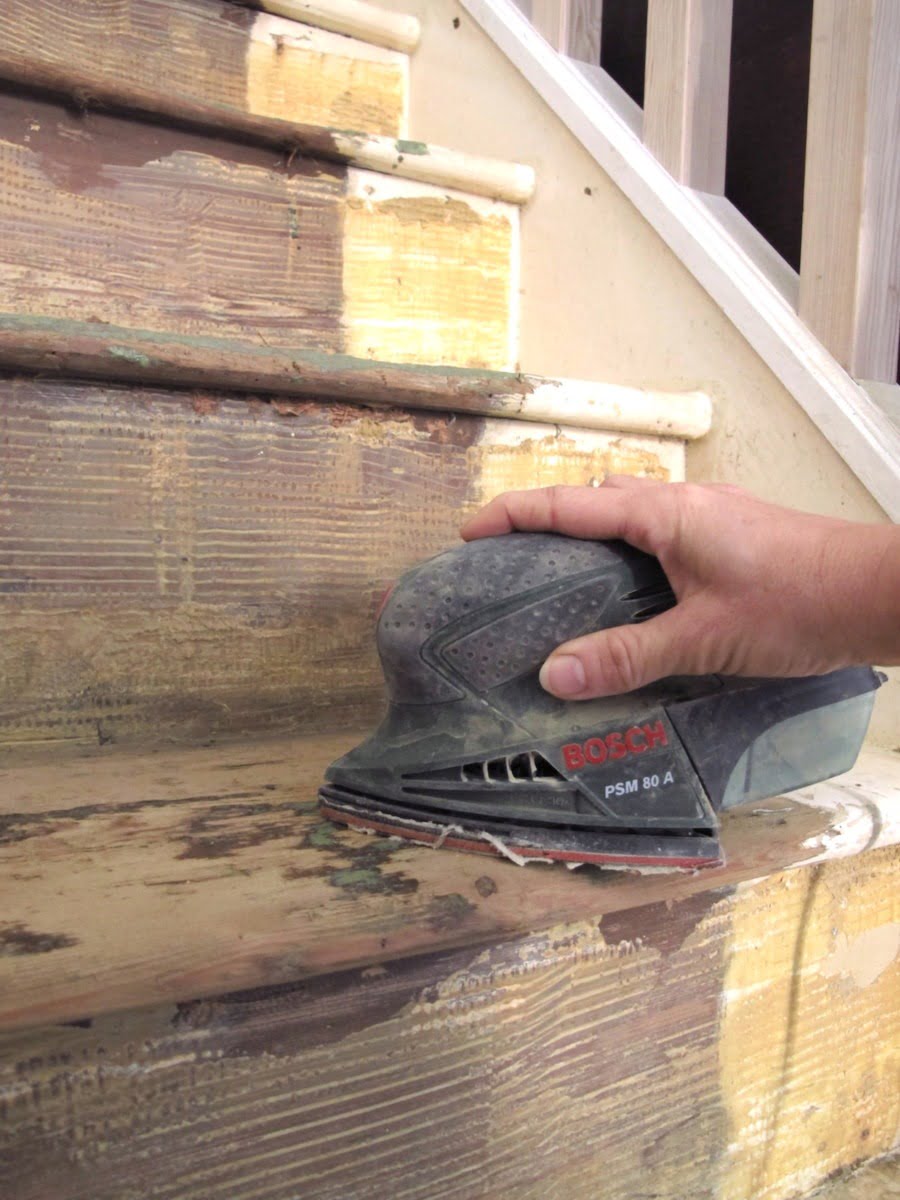
Scrubbing And Sanding
Can you see that green stuff above? That is the old underlay which over the years has turned into a sticky mess. It has the same constancy as chewing gum. All over my stairs. I tried removing it with a mouse-shaped hand sander but to no effect. The first step took about 30 mins of sanding and I got virtually nowhere.
As we all know, there no easy shortcuts when it comes to DIY. After a quick phone call to my mum and dad for some advice, I realised this project was going to take a little longer than I hoped.
I filled a bucket of hot water filled to the brim with sugar soap, I had to scrub it off the green latex gunk by hand. For 12 steps.
By now the dog was cowering in the corner from all the noise, and I think my neighbours officially hate me. And, did I mention I had a hangover?
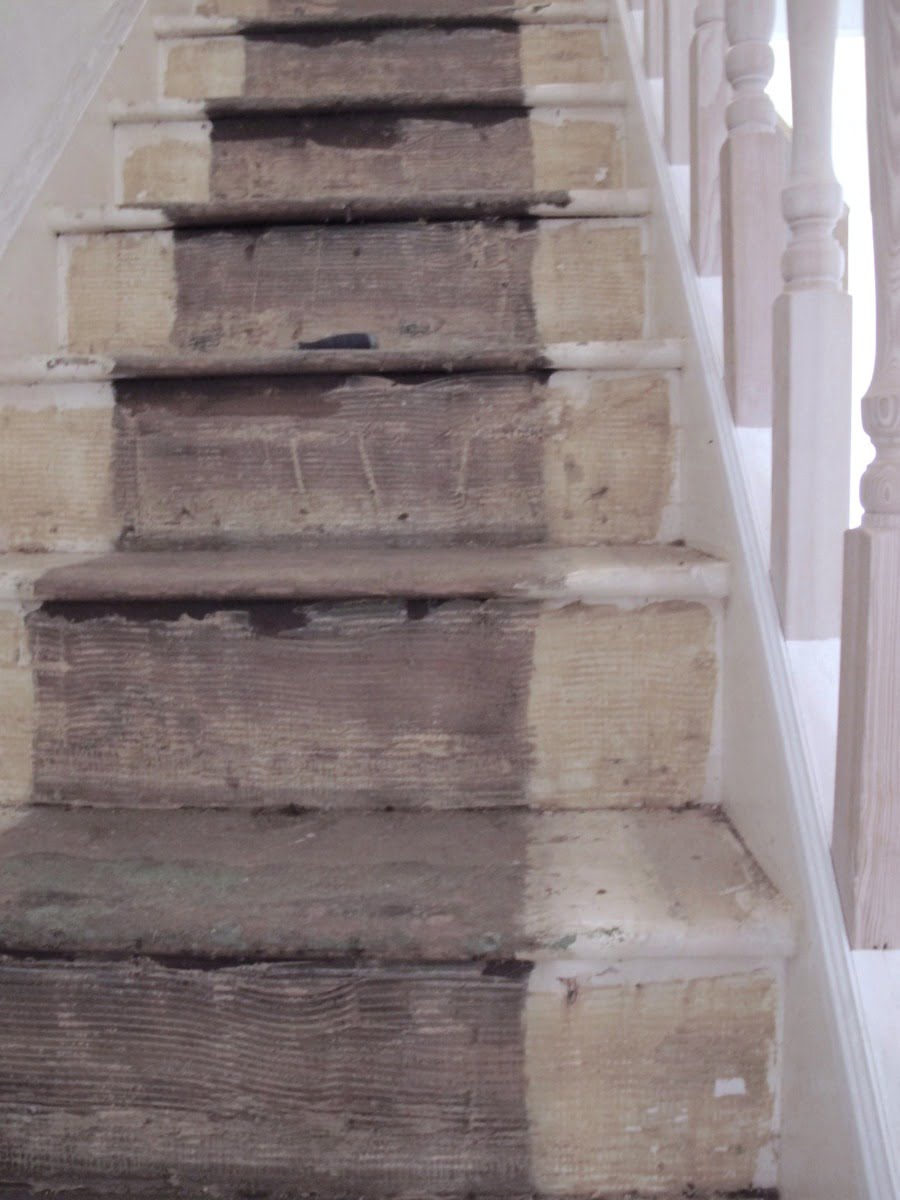
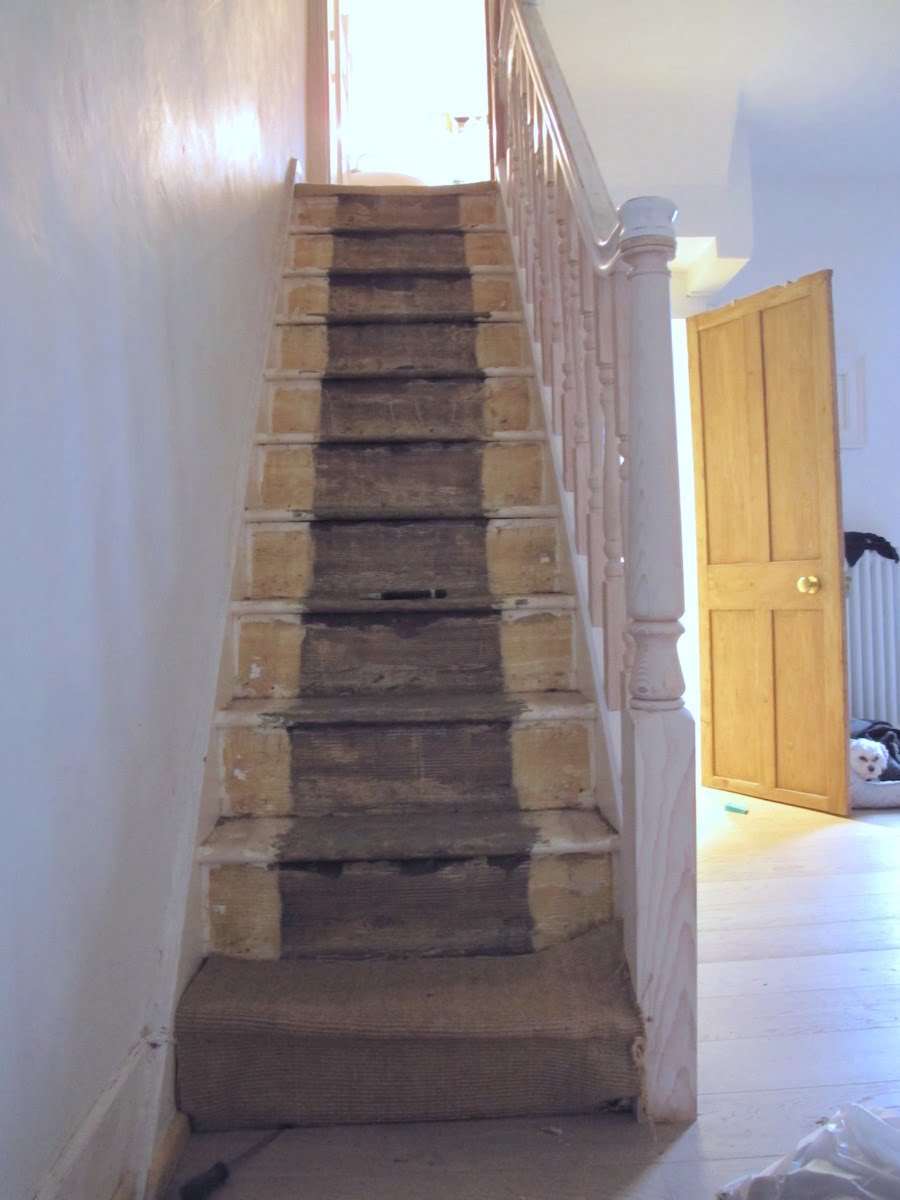
Two hours in…
After about three buckets of hot water and lots of hard work later, I managed to get about 50% of the green stuff off. Next on the list is to scrape off the rest of the sticky stuff without damaging the wood.
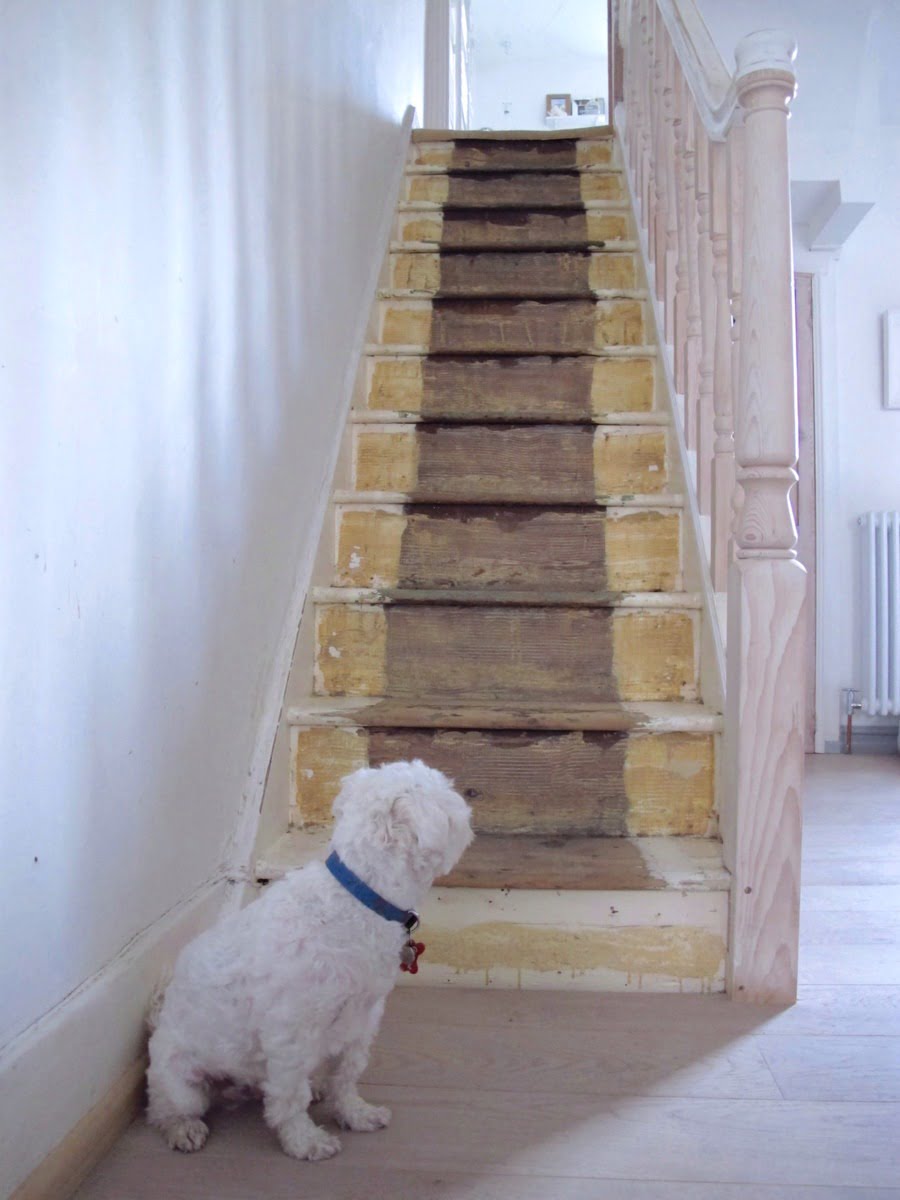
Lessons Learnt
The above photos is where I’m at after day two. Dog is a bit happier. I’m a bit happier. This is what I have learned so far about tacking this stair overhaul:
1/ It’s going to take far longer than you think. I spent about 6 hours to get to this stage for 12 steps.
2/ Make sure you have the right tools – and wear gloves.
3/ Be prepared for dust everywhere. Close doors. Put down dust sheets.
4/ Expect the unexpected. I didn’t think that the latex underlay was going to be such a pain to get off.
6/ Hammer in every sticking-out nail. Take your time over it. I’m also going to try and work out how to fix my squeaky steps too.
7/ I’m still at the preparation stage so there are splinters everywhere. Wear slippers until you are done (animal print optional).
8/ Avoid red wine the night before.
Cost = £0
Apart from the tools which I had already, this DIY stair case renovation hasn’t cost me anything more than just my time and sanity so far. Although at some points, I was wishing I had called a pro in to finish off for me. Although if you use a staircase renovation company instead, it will likely cost more, BUT will be a quicker process and could look like a brand new staircase – and you don’t have to worry about the messy…. something to think about for sure for next time.
All I have left to do with my stairs is sand back the wooden stairs by hand with a more heavy duty belt sander with a coarse sandpaper. Then I’ll have to go over it again with the mouse to get into the corners and to smooth back the layers of paint (I can count about 4 layers).
Once this is done, I’ve got to prime the stairs with a decent floor paint primer – this one by Farrow & Ball comes high recommended.
Once that has been done, I’ll start on stage 3 of my stair case DIY renovation – which I’m going to reveal on here soon – so stay posted! I’ve picked out THE MOST AMAZING CARPET EVER from Axminter which I’m dying to share with you.
how to renovate a staircase in one day
Any advice would be welcomed over here.
Do miss out on the end result of this stair makeover. I promise you it’s going to be a corker. Sign up to my WeLoveHome newsletter – no spam (I promise). Just friendly updates so you don’t miss a thing from the blog.
** All opinions, DIY and photos are mine.
You May Also Like
How To Choose Lighting For Your Home: Expert Guide
Transform Your Staircase With This Quick & Easy DIY Wallpaper Idea
Great job! I remember our staircase being like that and god it was hard to live with! When we had rubble in our hallway we found it useful to keep the door open but also keep a fan on at the other side of the room, so slowly throughout the day the dust and dirt would be pushed outside, rather than settling back on the floor once you stop for a break. Can’t wait to see how you finish it hun!
Also, maybe next time you should drink the wine DURING to make it more fun 😉
If I drank wine while painting – my lines would get more ‘creative’ as I went. It’s now painted and I can’t wait to show you what i have done. x
Oh, these things always take three times longer than you think don’t they? Made me laugh though (sorry). I’m sure you’ve never touched a glass of red wine since!! 😉
Stairs are looking sooo much better already though! I shall look forward to seeing them in all their glory when they’re finished x
I thought you might feel my stair pain……it’s been a few weeks now but I’m getting there with this DIY project. And no, I’d never say good-bye to wine (just maybe not so much before a loud and dusty job).
Brilliant! I love these tips, I need to find some stairs now, I want to renovate some!
You can come finish mine off :))
I have the exact same project to do, so this is really useful!! I’ve stripped the carpet off (luckily no glue only nails) and they’ve been sitting like your bottom image for a few months now while I decide what to do and gear up the energy to do all the sanding. Can’t wait to see your finished stairs! The hard work will be worth it x
They are looking amazing already just with the first coat of paint. I’m just a whisker away from finishing them.
What a big job, but good on you and what a difference it makes. Good on you starting it with a hangover!!
I don’t think I need praise! Maybe a paracetamol??
That does not sound like a job I would want to tackle with a hangover. Well done you for persevering though. It already looks so much better. Can’t wait to see how you finish it.
Dying to show you too.
Oh my goodness, you did so well to do all that with a hangover. Sanding is my biggest nightmare. So much dust!! The stairs are looking way better, though, so well worth it!! 🙂
Great job, your stairs are looking fab!
They look great 🙂
have you painted your stairs yet? curious as to how the farrow and ball paint worked out? We have just painted all of the floors upstairs and stairs in our house and were debating whether to use farrow and ball or ronseal. I’d read that the F&B paints used to be really great but less so now, what did you think? We’re pretty happy with the ronseal but it’s only been a few months. Excited to see the results!!
Hey Sarai.
Yes I have painted them. I’m doing a blog post on it soon – and a video! I used Farrow + Ball floor wood primer (it came highly recommended to me). I painted on 2 coats of that, then two coats of Little Greene Paint Company paint oil wood paint to match the woodwork throughout my house. Farrow + Ball paint is amazing stuff but I found it needed 3 coats on the walls to get a strong colour finish which can work out pricey. My friend painted her in F+B and it looks great. Being floorboards you are going to get some wear and tear over time. Hope this helps.
My husband and I are discussing ripping up our carpeted stairs and converting to stained wood.Unfortunately our stairs are made of waferboard and shims for the most part. It will take time, Patience is virtue.
Oh, Before reading this article, I find it difficult to renovate carpeted stairs to wood, but thank to your post, I feel it is as easy as a pie. Thank you.